Battle of Bunker Hill
Prelude to Battle
The Battle of Bunker Hill, fought on June 17, 1775, during the early stages of the American Revolutionary War, was a pivotal moment that defined the spirit and resolve of the American colonies. Tensions had been escalating between Britain and its American colonies for over a decade, as the colonies grew increasingly resistant to British control, particularly in the aftermath of the intolerable taxes imposed without representation. Events like the Boston Tea Party and the skirmishes at Lexington and Concord had already pushed both sides to the brink of war, and by the spring of 1775, the Continental Congress had formed the Continental Army under General George Washington.
Boston, under British control, became the focal point of these growing hostilities. General Thomas Gage, the British military governor, faced increasing unrest from colonial militias gathering around the city. The colonists, now armed and determined to fight for their rights, sought to drive the British from Boston. Strategically, controlling the heights surrounding Boston, such as Bunker Hill and nearby Breed's Hill, would give the colonists a significant advantage, providing a vantage point to bombard the British forces and fleet in the harbor.
The battle was not originally intended for Bunker Hill itself. Instead, the colonial forces initially aimed to fortify Bunker Hill but instead constructed their defenses on Breed's Hill due to a strategic oversight. This decision would prove crucial as the battle unfolded. Though the battle is remembered for its intensity, it also highlighted the colonial forces' tenacity and the British underestimation of their capabilities.
Opposing Forces: The British
On the British side, General Gage commanded a well-trained, professional army that was part of the most formidable military force in the world at the time. British regulars were highly disciplined, equipped with smoothbore muskets, and organized into regimented formations. Supporting Gage was Major General William Howe, a key figure in the unfolding conflict. Howe would lead the British ground assault on Breed’s Hill.
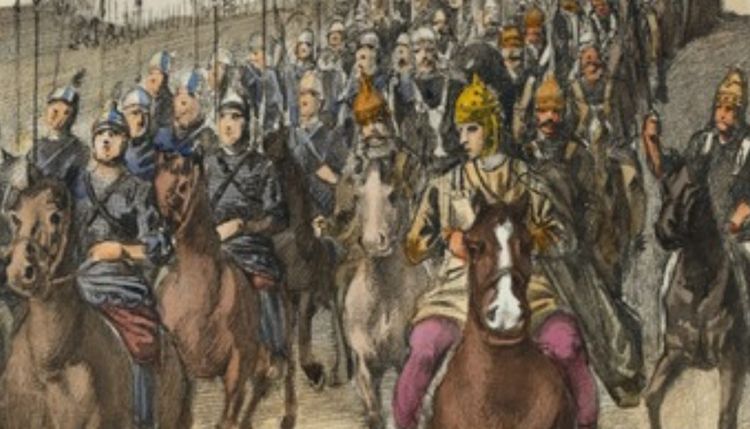
The British army at the Battle of Bunker Hill consisted of roughly 2,200 soldiers, including regular infantry, grenadiers, and light infantry units. British artillery supported the infantry, though its effectiveness was limited due to the terrain. These forces were well-prepared and highly trained, but they faced several challenges. The British command initially underestimated the colonial forces, viewing them as a poorly organized militia. In addition, the British soldiers wore bright red coats, which made them highly visible targets for the entrenched colonials on the hill. Logistical constraints also limited their ability to coordinate large-scale assaults efficiently.
Morale in the British ranks remained high, bolstered by their perceived superiority and the assumption that the colonial rebellion could be easily quashed with one decisive victory. However, the events that followed would challenge these assumptions.
Opposing Forces: The Colonists
On the other side of the battlefield stood the American colonial forces, consisting primarily of militia drawn from various New England colonies. The militia was under the command of Colonel William Prescott, a seasoned officer who led around 1,500 men. These forces were vastly different from the British in terms of training, equipment, and organization. Many of the colonists were farmers and tradesmen who had little military experience, armed with a mix of muskets and hunting rifles. The colonial army lacked formal uniforms, supply lines were limited, and they faced a severe shortage of ammunition.
Nevertheless, the colonial forces had two distinct advantages: their knowledge of the terrain and their strong motivation to defend their homes and fight for their cause. Prescott and other leaders, such as Israel Putnam and Joseph Warren, inspired their men to dig in on Breed’s Hill and prepare for a British assault. Prescott’s famous command, “Don’t fire until you see the whites of their eyes,” became legendary, reflecting the need to conserve ammunition and maximize the impact of each shot.
Though less experienced and poorly supplied, the colonial forces’ morale was buoyed by a sense of purpose. They were not fighting for pay or imperial ambition but for their freedom and independence. This gave them a psychological edge, even as they faced a daunting, professional army.
Countdown to Battle
In the days leading up to the battle, both sides engaged in maneuvering for position. The colonial forces, recognizing the strategic importance of the hills overlooking Boston, began fortifying Breed’s Hill under the cover of darkness on the night of June 16, 1775. By dawn, they had constructed rudimentary defenses, including earthworks and wooden barricades. These fortifications, though hastily built, provided the colonists with a formidable defensive position.
The British command, upon realizing the colonial forces had fortified the heights, understood the need to dislodge them swiftly. General Howe and General Gage devised a plan for a frontal assault, believing that a direct attack would scatter the colonists and reassert British control over the area. Despite intelligence indicating the strength of the colonial position, Howe was confident that the professional British troops could overwhelm the militia.
Tension mounted as the British forces prepared to cross Boston Harbor and land on the Charlestown Peninsula. Both armies understood the importance of the upcoming battle. For the colonists, it was a test of their ability to stand up to the might of the British Empire. For the British, it was a chance to crush the rebellion before it could gain further momentum.
The Battle
Phase 1: British Landing and Initial Assault
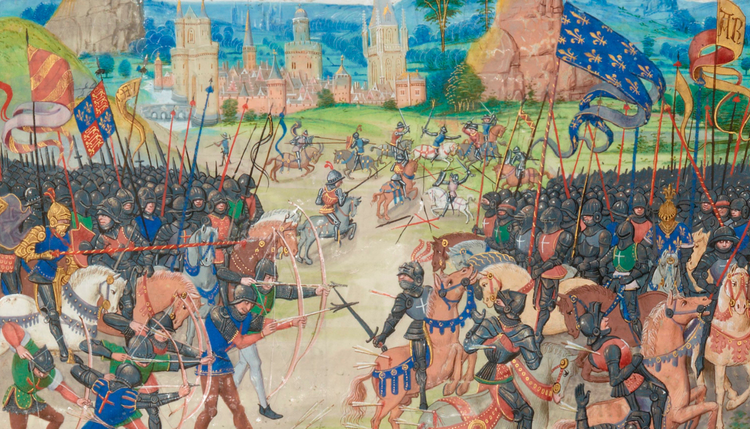
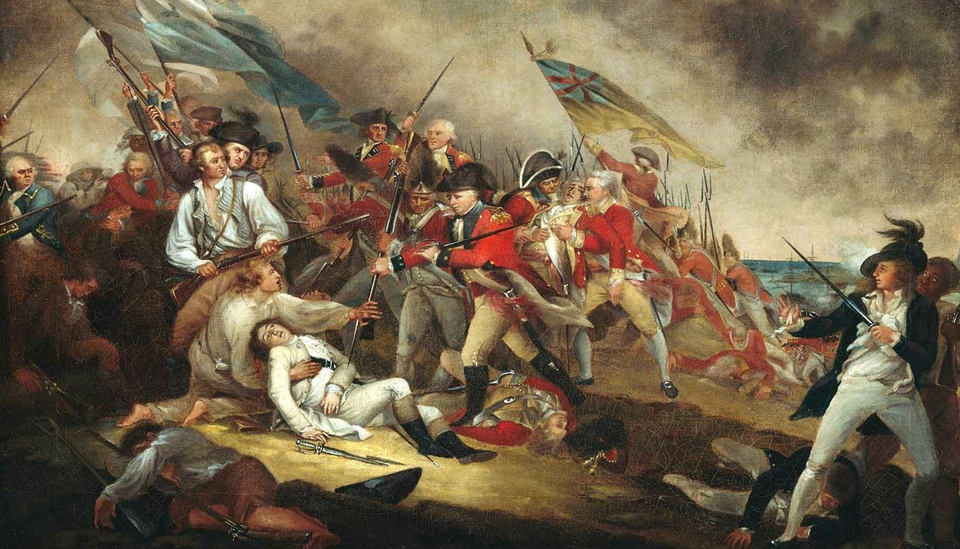
On the morning of June 17, the British began their assault. As the red-coated troops disembarked from their ships and formed ranks on the Charlestown Peninsula, they encountered immediate resistance. Colonial snipers, positioned in Charlestown, harassed the British soldiers with musket fire, prompting the British navy to bombard the town in response, setting it ablaze. Flames engulfed buildings, sending thick plumes of smoke into the sky, creating a chaotic backdrop for the unfolding battle.
Major General William Howe, commanding the British ground forces, pressed forward with a straightforward plan: a direct assault on the colonial defenses on Breed’s Hill. He divided his forces into two main columns. One column, composed of grenadiers and light infantry, aimed for the redoubt (the main fortification) at the top of the hill. The second column, consisting of more regular infantry, would advance on the colonial left flank, hoping to drive the defenders from their positions and create an opening for a full-scale breakthrough.
As the British formed their battle lines, the oppressive heat of the summer sun bore down on them, making their heavy woolen uniforms stifling and uncomfortable. Yet, the disciplined ranks pressed forward, their bayonets glinting in the sunlight. The colonial forces, behind their makeshift fortifications, watched intently, waiting for the British to draw near before unleashing their devastating fire.
Phase 2: First Attack
The first British assault began in the early afternoon. Howe’s troops, moving in precise formations, steadily ascended the hill under a blistering sun. As they approached, the colonists, entrenched behind their earthworks, remained silent. Following Colonel William Prescott’s orders, they held their fire until the British were within close range. Then, in a coordinated effort, they unleashed a devastating volley of musket fire.
The impact was immediate and brutal. Entire rows of British soldiers fell, their bright red coats staining the grassy hillside. Officers shouted commands, urging their men forward, but the relentless colonial fire staggered the assault. Musket balls tore through the ranks, and confusion spread as wounded soldiers stumbled and collapsed. Despite their discipline, the British found themselves unable to maintain momentum and were forced to retreat, regrouping at the base of the hill to prepare for another attack.
Phase 3: Second Attack
Undeterred, Howe reorganized his forces and launched a second assault. This time, British artillery intensified its bombardment, pounding the colonial defenses in an attempt to weaken their resolve. Cannon fire sent earth and debris flying, yet the colonial fortifications held. The defenders, though now low on ammunition, remained steadfast, knowing they could not afford to waste a single shot.
The British troops, reorganized and reinforced, began their second climb. This time, they moved more cautiously, advancing in tighter formations. But as they neared the colonial positions, they were once again met with a ferocious volley. The disciplined fire of the colonists cut through the British ranks, forcing them to stagger and falter once more. The sheer determination of the colonial fighters, despite their inferior numbers and supplies, shocked the British officers. After a fierce exchange of musket fire, the British were repelled yet again, suffering heavy casualties.
Phase 4: Final Assault and Colonial Retreat
The third British assault would prove decisive. The colonial forces, now critically low on ammunition, began resorting to desperate measures. Many militiamen loaded their last shots, while others picked up rocks and bayonets in anticipation of close-quarters combat. The British, sensing their weakening enemy, fixed bayonets and prepared for one final charge.
With a thunderous cry, the British troops surged forward, ignoring their own casualties. As they reached the colonial fortifications, brutal hand-to-hand combat ensued. Muskets were used as clubs, bayonets clashed, and men fought desperately for control of the redoubt. The colonists, exhausted and outnumbered, were gradually overwhelmed. Realizing they could not hold the position any longer, Prescott ordered a retreat.
Fighting their way out, the colonial forces withdrew in an organized manner, preventing a complete rout. Many defenders managed to escape, but the battle had taken its toll. Despite their retreat, the colonial forces had inflicted staggering losses on the British—over 1,000 soldiers were killed or wounded, a heavy price for what was expected to be an easy victory. The colonists, in comparison, suffered around 400 casualties, but their resilience and effectiveness in battle stunned the British commanders.
The Battle of Bunker Hill, though technically a British victory, proved to be a turning point in the American Revolution. The heavy losses suffered by the British demonstrated that the colonial forces were far more formidable than previously believed. This battle, fought with raw determination and limited resources, became a symbol of the American fight for independence, inspiring further resistance against British rule.
Battle Outcome
Though the British technically won the Battle of Bunker Hill, it was a Pyrrhic victory. The high cost in British lives shocked the commanders, particularly General Howe, who had not anticipated such fierce resistance. The battle demonstrated that the colonial forces, though inexperienced, were capable of standing up to the British regulars. The colonists, despite losing the hill, were emboldened by their ability to inflict severe damage on the British army.
Aftermath
The Battle of Bunker Hill had profound consequences for both sides. For the British, it underscored the difficulty of quelling the colonial rebellion and the potential cost of further military campaigns. For the American colonies, it was a powerful symbol of resistance and determination. The battle also convinced many colonists that full independence from Britain was not only possible but necessary. It solidified the resolve of the Continental Congress, which soon after formally declared independence in July 1776.
In the broader context of the American Revolutionary War, Bunker Hill served as a rallying point for the colonies. It marked the first major battle of the war and set the stage for future confrontations between the British and the Continental Army, as the struggle for American independence intensified.